
 |
| A rare sight: our first stacked stone landscape bed in the greater Houston, Texas suburbs. I'm hoping that it will stand the test of time, and this post will describe the construction steps that we attempted in order to make it so. |
 |
| The bane of our collective upper Texas coast existence: interior damage to a home as possible evidence of foundation settling and/or breakage. Screengrabbed from Houston realtor Bill Edge's article on how to care for your home's slab foundation. |
Here in greater Houston, most areas are underlain by clay-rich soils that shrink and swell with changes in moisture level. They're constantly on the move to some degree, and this can wreak havoc with all manner of structural improvements.
 |
| I'm citing greater Houston because we live here, but unstable soils are also found in many other areas of the country. This diagram illustrates the principles of foundation reinforcement. Screengrabbed from the website of Buildet Foundation Repair of St. Louis Missouri. |
 |
| This is a small-scale example from a location within the City of Houston. Do you see how the sidewalk segment attached to the manhole is newer than the rest of the sidewalk (concrete is bright white)? That's because differential settling lowered all of the surrounding sidewalk, but the manhole shaft acted as a fixed pier which kept that one segment elevated while the rest of the soil sank by several inches. The City later came back and replaced that segment so that folks would not trip over its raised edges. Screengrabbed from Googlemaps Streetview for a location in the Clear Lake area. |
 |
| You don't have to go far before you see an example of the rigid-structure damage I'm talking about. Here's a low landscaping wall split because of shifting soils (or so it appears). The location? Galveston County Courthouse Annex on Calder Road. |
 |
| One of the most important things you have to remember, especially if your house is new, is that the its construction involved a lot of soil disturbance and infill, especially adjacent to your slab. That's a necessary process associated with grading suburban lots and building slab foundations. This pic shows our front entrance shortly after the walkway was poured. You can see that a lot of soil was "missing" from this area, which means it had to be replaced... |
 |
| ...and the way they replace it is by bringing in dump trucks of fill, which is often a sandy material. This then gets bulldozed around the lot for proper grading and leveling. You'll see this distinctive orange color in some photos that follow. |
 |
| We got past our mental roadblock on front-yard landscaping on the day when we encountered these particular pallets of stone, which we found at Sunland Nursery, 402 FM 646 between Highway 3 and IH-45 (basically, about a half mile northeast of the huge shopping complex at FM 646 and the freeway). Sunland doesn't appear to have a website, but it's run by an older gentleman named George. I had a "Eureka!" moment because these sandstone segments are much larger than any other chopped stone that I had seen for sale around here - in particular, they are wider. It occurred to me that maybe it had a better potential to "float" because each one would distribute its considerable weight (20 to 60 pounds per piece) over a larger footprint. |
 |
| The moment of financial truth as the stone gets set on the scale. Stone is most often sold by the pallet around here, and prices have risen steadily in the past couple of years. Generally you can expect to pay in the range of $0.17 to $0.27 per pound (as of spring 2013), depending on the type of stone. This will make each pallet come out to around one thousand dollars. Yes, you heard correctly - a grand per pallet. That is the unfortunate reality of living in a geographic area where we have no suitable natural stone for hundreds of miles in every direction. This stuff got transported in from Oklahoma, so the price reflects the considerable cost of transportation. The other cost represented in that price is the cost of labor. George the landscaper told me that, when he requests this cut, his supplier complains bitterly about having to chop the rock into these wider pieces. It's difficult work. Initially, my husband and I were not planning to put this much investment into our foundation beds. We were instead planning to save the lion's share of the budget for making a nice flagstone courtyard in the center of our lawn. However, when we saw this specialized stone, we changed our focus because we really liked it. |
 |
| So, OK, this is what our front bed looked like prior to any work beginning (except I had scraped off and tarp'd the top layer of mulch and pulled out a few central shrubs). It was just an ordinary on-grade suburban foundation bed edged in the same kind of sandstone, but a much smaller chop. Nothing terrible about this, but nothing distinctive or special, either. |
 |
| As I mentioned in this previous post, this was simply a mulch bed set on grade. It followed the contours of the lot, which is strongly sloped between these two houses to promote efficient rainwater drainage. For this reason, the bed had the visual appearance of "sagging" to the left, into the drainage swale. Again, nothing terrible about this, but it's very ordinary. Not much sophistication to the construction or the design. It began its esthetic life as a bunch of mulch simply tossed on top of the builder's graded suburban lot. |
 |
| OK, now we're beginning to excavate for the stacked stone foundational support. Here you see that same orange-colored sandy fill material that the builder had laid down when the house was built. |
 |
| Somewhere underneath all that soil that had to get disturbed in your yard as your house was being built, there is "native" soil which is undisturbed and for that reason, it's more compacted than the top layers of bulldozed soil and emplaced fill. In the greater Houston area, that's often identifiable as a relatively stiff clay "gumbo" soil (the stuff that sticks annoyingly to your boots). In this pic, you can see a hint of it - it's the taupe-gray material visible near photo center. If you are able to dig down and set your landscaping improvements upon this native layer, you'll likely have better support. It's not always practical to do that, depending on the depth of fill. |
 |
| Support is key. Here you see the limestone aggregate and crushed granite that underpinned this stacked stone. That pile in the background is fill excavated from the footprint of the stone foundation. |
 |
| The limestone gravel is white against the white driveway in the pic above, so it's difficult to see. Even this basic stuff has to be brought in from the Hill Country, a few hundred miles away. Houston is underlain by soft coastal sediment deposits with no rock to speak of. |
 |
| Corner of the excavation. The emplaced fill was pretty thick here, given that the lot was built up for drainage. Incidentally, if you're doing anything like this, first check your property survey for setbacks and utility easements. Our original curved mulch bed actually extended into the five-foot setback for this lot line. That's not such a big deal when there's no structure to an ordinary mulch bed, but with a larger investment like this raised bed, it's important to contain it within setbacks or there could be trouble later on (e.g., when you sell your house, any structures impinging on setbacks will likely be called out as a nonconformance). |
 |
| After the outline of the bed was excavated, the area was infilled with the limestone and compacted. |
 |
| Notice two things here: first, the footprint actually ended up being wider than the stacked stone will be, particularly in foreground areas where the wall will become thicker due to decreasing grade. This is important for added stability. Second, there's a grade step-down visible near the bottom of the photo. This cut stone is so expensive that you don't want to be underpinning your wall with any more than necessary. As the grade changes, you can step like this, rather than digging the entire trench to a single level. If this didn't happen, some of the stone would get buried, at $4.00 to $16.00 per piece! |
 |
| Notice the following: (1) The crushed granite was added on top of the limestone within the generous footprint of the base, the footprint which extends out to either side of the rock which was wide to begin with. This is all done with the intention of constructing as robust a base as practicable (given cost considerations) to minimize future shifting and settling. (2) Pink twine was strung to keep the structure on level. (3) Stone stacking started at the corner, which is a geometric necessity (you can't start anywhere else and have the corner come out properly). (4) This is a dry-stack methodology. There is no mortar placed between the stones. |
Number (4) above is what I meant when I said I decided not to fight nature. I expect soils in this area to shrink and swell and shift as the years pass, because that's what they do around here. Instead of trying to oppose this, I decided just to create a robust base, but then if the soils shift in two or five or ten years, I'll simply disassemble this wall, re-level the base, and re-stack.
To say the same thing another way, my principal investment is in the stones themselves. If I were to mortar them together and then this whole apparatus shifts much like the Courthouse Annex's low brick wall did, I'm going to damage the stones, perhaps irreparably, taking them back apart. If instead I leave this whole thing float, I'm preserving the bulk of my investment even if it requires future adjustment.
My husband took this line of reasoning even one step further in noting with amusement that, if housing resale prices in Centerpointe soften to the point where we cannot get our stacked stone investment back upon selling this house at some future point, we could simply pay movers to pick up all this stone and take it to our next house, so we could re-stack it there.
Now, on with the final bits of the description.
 |
| The actual placement of the stones is an art. This is natural stone, so it's not all the same thickness or shape. It's basically a process of iteration to find the optimal configuration. |
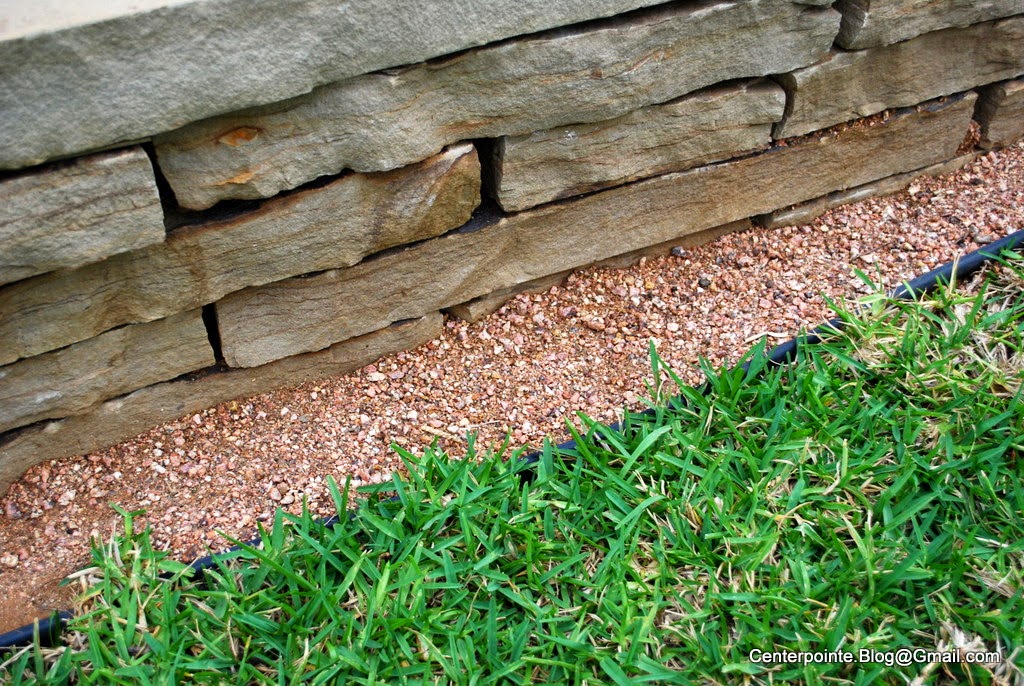 |
| Using pre-cast cement blocks is much more convenient because they're all identically sized (and also a lot cheaper), but we find it to be nowhere near as beautiful as natural stone. Stacked stone in greater Houston - the ultimate luxury. I'm really happy that we decided to include crushed granite in the base like this (it was our landscaper's idea). It adds another visual dimension, a meatier look, and it makes for an easier lawn-edging task here. Crushed granite will become even more important in Part 2 of this post. |
 |
| BEFORE and AFTER: "Builder basic" becomes bodacious. |
In summary, the keys to this dry-stacking approach are as follows:
- The stone is wide enough and heavy enough to bear the weight of the soil in the bed behind it without needing to be physically fixed. Narrower stone would not work without structural reinforcement.
- The wall is low enough so that significant shear stress does not occur.
- The base is robust enough (hopefully) to minimize the effects of shifting.
- The stones are overlapped for optimal weight distribution.
- The stacked stone is plumb and level so that there are no lateral forcings that would exacerbate a shrink-swell-driven tendency for the entire unit to gravity-creep. Remember what I said three or four times when describing how we built our cinder block cactus garden: whatever it is, build it level. If you fail to do this, you can expect misery, and sooner rather than later.
OK, so I know you're wondering: What the heck did this latest suburban tract home escapade of ours cost?!
Here's what went into the bill from Greenscapes Lawn and Landscape:
- One pallet of this very expensive stacked Oklahoma sandstone
- About a yard each of crushed granite and crushed limestone
- Transportation of all materials
- Labor (one day of work for the landscape supervisor and two apprentices)
 |
| For those of you who are regular blog readers: YES, I tried to find an honest construction contractor who is operating above the law, including where tax payments are concerned. Note the date on that invoice stub - April 29, 2013. I signed that contract and paid this bill almost a month before I raised those potentially uncomfortable questions about the source of labor for the building of League City's new Public Safety Building. I do actually try to put my money where my mouth is - in this case, literally. |
Greenscapes Lawn and Landscape is owned by a young man named Joe Cunningham. He's from another part of America where construction business doesn't exactly take place like it does in Texas. He told me that he's paying his taxes and I was inclined to believe him.
Could you get a stacked stone bed built around here for less than that amount shown above? Almost certainly. Could it be done for much less but still with equivalent construction care by an experienced professional who is actually declaring their income? Please drop me an email if you find such a contractor.
Anyway, now you know the secret as to why my husband and I are such consummate DIYers: if we limit ourselves to using legitimate contractors, we can't afford to do very much contracting. Of the massive amount of customization work we've done on our house over the past three years, this was the very first time that we hired someone.
In Part 2 of this post, I'll describe our second stacked stone bed, the supportive base for which my husband and I designed and executed ourselves, and which is different from the method shown above. Stay tuned.
No comments:
Post a Comment
I'm forced to moderate comments because the spammers have become too much for me to keep up with. If you have a legitimate comment, I will post it promptly. Sorry for the inconvenience.